Clicker Training Heel for Dogs and Puppies
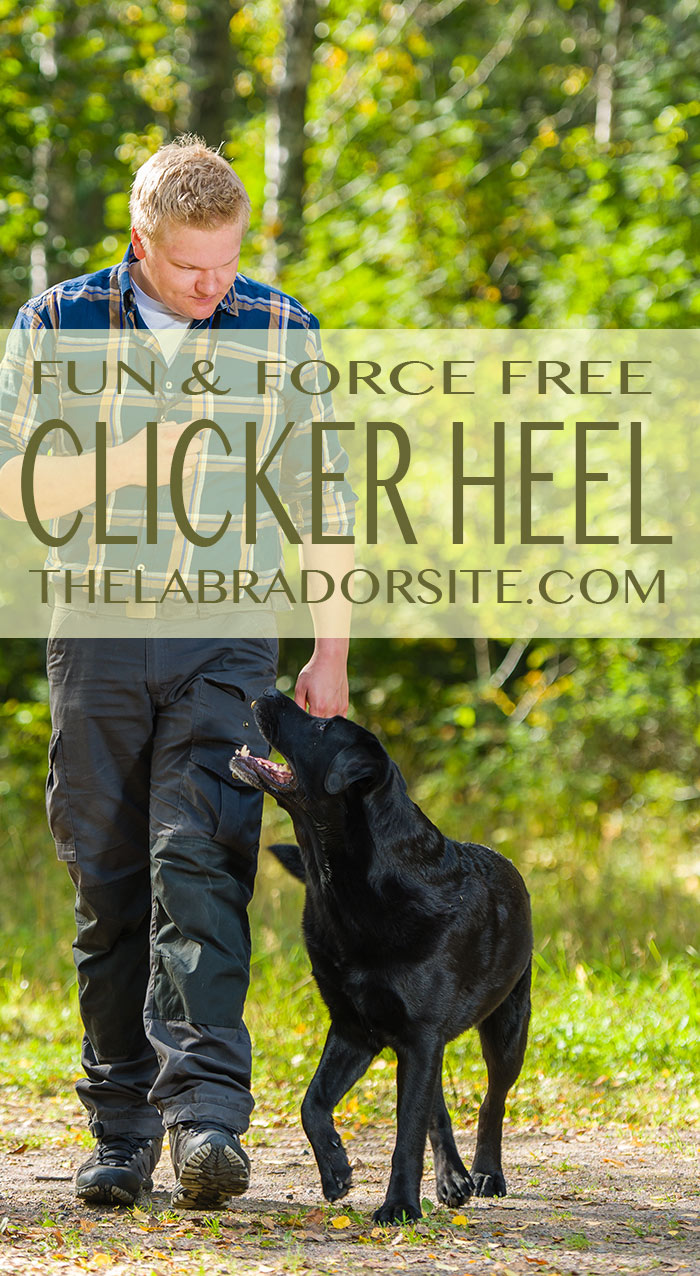
Today I’m going to show you how to use clicker training techniques to keep your Labrador at your side. There are lots of different ways to teach a dog the ‘heel’ position, but this clicker training heel lesson is a fun, simple, gentle outdoor training exercise for dogs of any age.
*Products included in this article were carefully and independently selected by the Labrador Site team. If you decide to make a purchase from one of the links marked by an asterisk, we may earn a small commission on that sale. This is at no extra cost to you.
CONTENTS AND LINKS
You’ll be using the clicker to teach a dog or puppy to walk next to you without force, leashes, punishment, harnesses or any equipment other than a clicker and some training treats.
Getting your dog’s attention outdoors
This clicker training exercise is a great way to improve your bond with your dog and to get his attention focused on you outdoors
This training lesson is also a good way to learn an important dog training skill known as ‘shaping’. And it is a lot of fun.
Why teach your dog to heel with a clicker?
People often struggle with training a bouncy Labrador to walk to heel. Owners of young Labradors aged six to nine months old, often get into a horrid cycle of yanking and jerking at the leash while the dog just gets better and stronger at pulling, and at ignoring his poor owner.
This clicker technique ‘resets’ the relationship between dog and human to one of mutual pleasure and co-operation. And gets rid of the battleground you may be experiencing right now.
Clicker training heel is a great technique to use for fidgety, lively dog.
Does clicker training work?
Clicker training is now known to be very effective. Although it was once regarded with skepticism and looked on as only suitable for teaching tricks, those days are long gone.

Clicker training in some form or another, has now been widely adopted by professional trainers, both in the public domain, and in training service and therapy dogs.
How does clicker training heel work?
Clicker training is a type of positive reinforcement training (force free and reward based) that uses a mechanical marker to let a dog know when he did something right.
The dog earns a treat each time he hears the marker, so that doing ‘the thing’ you like (pleasing you) and being happy himself, become entwined in his mind. This ‘reinforces’ or strengthens the behaviors you have marked. What you need to do is make sure you mark the right ones!
All you will need is your imagination, a clicker*(paid link), a bag of tiny treats, and access to an enclosed garden or yard where your dog cannot disappear from sight!
Before you begin, charge up your clicker by following the instructions in this link.
What is shaping?
I said you would learn how to ‘shape’ using this lesson, and this is a nice simple way to begin learning the power of shaping. Shaping simply means rewarding tiny changes in behavior, each change moving you a little closer to your goal. This is ideal for behaviors that your dog doesn’t do naturally.
For example, your dog might not lift his paw high in the air when you say ‘high five’ but I bet he occasionally lifts his paw an inch or so off the ground.
By shaping, you would mark increasingly higher lifts of the paw until you got the ‘paw in the air’ that you wanted. This clicker heel lesson works in the same way, changing behavior in little steps.
Prepare for clicker heel training
You need some space for this exercise so unless you have some very large rooms in your home, it isn’t ideal for carrying out indoors.
A secure yard, patio, small garden, or even a large outbuilding or garage will do fine. You just need space to be able to walk about and throw treats well away from you to set your dog up for each learning experience.
A hard surface is better than grass as it is easier for your dog to quickly find and eat the treats.
Click and treat – why food?
Each time you press the clicker you will throw a treat well away from you for your dog to run and find. That is one repetition. The more repetitions you fit into a training session, the faster he will learn.
You don’t have to use treats, a reward such as a game with a toy can work, but in the early stages we want lots of reps, and a tiny treat can be eaten much faster than you can amuse your dog with a toy.
What kind of treat?
Because clicker training uses a lot of food, it needs to be decent quality, not sugary junk. With a puppy, it is usually fine at this point to simply use some of the kibble he would normally have in a bowl for his next meal.
When you start to work in more challenging situations, and with older dogs, you may find little chunks of nice roast meat or sausage will get you the best results.
What kind of treat bag?
Because you are going to be walking around, you’ll need to attach a treat bag to your belt, or line a pocket of your coat to hold your treats. This is my treat bag by Kurgo(paid link)*.
I like it because it has a rigid ‘stay open’ top (like a climber’s chalk bag) so my hand can dive in quickly without interruption. It fastens easily to my belt with a carabina and also fits nicely into a coat pocket. There is an inner drawstring to stop food falling out when you are not training. You can get it in blue too, and the last time I looked, the blue one was a lot cheaper.
What kind of clicker
You can buy clickers very cheaply in pet stores or online.
I use these with the wristband so that I don’t lose them*(paid link) when I let go.
I also have one on a lanyard that goes around my neck, for when I need my hands free some of the time.
So, now you have your clicker and treats, you are ready to start training!
The clicker heel circle
First stand in your yard and imagine a large circle lying on the ground to your left, like a giant hoop just laying on the floor.
The circle or hoop size should be at least six feet (2 metres) across.
Step just inside the circle so that the majority of the circle is out to your left hand side.
Now imagine that the circle is magnetically attracted to you, wherever you go the circle goes too.
Start walking around your garden and picture the circle walking with you, turning as you turn, stopping as you stop, like a devoted shadow.
Enter the Labrador!
Now bring your dog out into the yard. Make sure you have your clicker and treats with you. And start walking randomly around in different directions. A few steps one way, then a few steps another
Here is the important part:
Every time your Labrador enters your circle press the clicker and throw him a treat.
Throw the treat well outside the circle and whilst he is rushing after it turn in the other direction and move away from him.
As soon as the dog enters the circle again click and treat (C&T) again in exactly the same way.
Keep moving about throughout the session. Keep going for twenty repetitions or until you have used up 20 or so treats. This is one session.
Practice this two or three times a day if you can. More if you wish, but keep a couple of hours between sessions.
Shrinking the circle
When the dog is keenly rushing back into your circle from the start of each session you can start shrinking your circle. Make sure you are always standing just inside the circle with the bulk of the circle to your left. Only C&T the dog when he enters the circle.
Remember to keep moving, you are training your Labrador to take up a position relative to you no matter where you may be.
How small should the clicker heel circle be?
That depends on the size of your dog. Your final circle should be just big enough to contain your dog and to hold him in the position you want him to take up on your left hand side.
When your dog is consistently entering your small circle for the C&T you can start to increase the amount of time you get him to stay there. You can measure the time increase by counting the steps you take with the dog in your circle.
Increasing clicker heel duration
Up until now you have been clicking as soon as the dog enters your circle. Now you are going to withhold your click and treat until the dog stays in the circle whilst you walk two steps forwards.
If he leaves the circle before you complete two steps do not click.
Ignore him and turn away from him to walk in a different direction. Do not click unless he stays in that circle for two steps!
I’m sure you can see that once you have two steps, it is a simple matter to gradually increase the duration/distance of your heelwork.
Build up gradually from two steps to three, from three steps to five, and so on up to ten and twenty steps.
Your next job is to give your new skill a name.
Adding a name to the clicker heel
If you have used the ‘heel’ command before choose a different one. Your old command will be associated with incorrect behavior and a new word is a fresh start. You could try ‘close’ or ‘to me’.
Simply say the new word each time the dog enters your circle. Keep this up for a few sessions then try using the word to actually bring the dog into position. Make it easy for him to succeed at first. Don’t attempt to use your word when there are lots of exciting distractions around.
Progressing with the clicker heel
Remember that getting a dog to assume a position is just the start of training any skill. Be very sure not to ‘poison’ your nice new cue by setting your dog up to fail.

He won’t be able to do this whilst other people or dogs are around just yet, these are distractions that we have to ‘proof’ our training against gradually and carefully.
But this new behavior is the perfect foundation to that proofing process which we will look at in this article: How to stop your Labrador pulling on the lead.
And the training method is suitable for dogs of all ages, even small puppies.
More information
For a complete guide to raising a healthy and happy puppy don’t miss The Happy Puppy Handbook*(paid link).
Published in April 2014, the Happy Puppy Handbook covers every aspect of life with a small puppy.
It will help you prepare your home for the new arrival, and get your puppy off to a great start with potty training, socialization and early obedience.
Products included in this article were carefully and independently selected by the Labrador Site team. If you decide to make a purchase from one of the links marked by an asterisk, we may earn a small commission on that sale. This is at no extra cost to you.

Free Labrador Updates!
Get my training tips, news, reviews, and the latest from The Labrador Site delivered to your inbox


Hi Pippa. Why walk to heel on the left necessarily? When we walk on country roads, we walk on the right, so I assumed you would want your dog on the lead on your right. Am I missing something? Is it so you can keep your (typically dominant) right hand free for doing everything else?
My wife and I are loving The Happy Puppy and The Labrador Handbook. Our new Fox Red, Elsa, is 9 weeks old, so we haven’t yet started training her to walk to heel. We are just making sure we fully understand your principles and are totally consistent before we get too far in – but click and treat certainly works for the loo!
Many thanks and best wishes.
How old should your dog be before you start this?
Hi Pippa,
I’m about to start trying this – but I have a query please? When you add the signal does this temporarily become the marker or do you continue with the clicker to mark the behaviour as well? I’d be grateful if you could clarify. Many thanks. Love your articles and your happy puppy book!
Hi Tors, the signal is a cue, not a marker – have a look at this “what are clickers for” and this Cues versus commands” You need a signal to start the behaviour, and a marker to indicate success. Glad you like the books 🙂 Lots more detail on training techniques and principles on Totally Dog Training
Hi Pippa, thank you for the links, I’ve read them both but still have the same question. I think it is the “pairing” bit – I use the clicker when she gets into the circle to mark the event, that is all good. It is when I start quietly saying “heel” as she gets into the circle – is it instead or as well as the clicker? Thank you!
Why is the treat thrown outside the circle rather than placed where you want him to be -such as by your left foot as some trainers recommend?
So that you can repeatedly reward the puppy for seeking out the heel position. He has to choose to return to the circle to get another reward. This is building ‘the act’ of coming to heel, rather than duration of the heel position.
When do you start training your puppy to heel?
my puppy is 3 months old. He is very weak and his weight is about 1kg or 2.we went to a vet and he said he is fine and we give him meal 3 or 4 times a day and still he is not getting healthy . shall i give him som other extra feed.
I am in the city with a small garden. Room for six foot circles, but, can we progress to the park and do this in a larger setting. I assume it’s okay to use the long lead here? Thanks!
Hi Erica, we are all restricted somewhat by the facilities that are available to us. The problem with training basic skills in public places is dealing with distractions. Get as far as you can in the house and garden before attempting this outdoors, where you will need to use powerful rewards and go at unsocial hours to avoid/cope with distractions.
Pippa
starting clicker training today, I shall certainly try this out, I just wish writers would not assume that we all have humongous gardens, I can use the kids playpark so long as there are no kids there.